Linking Multiple Transactions in the Vault
In a forthcoming update to the SecureClose Vault, separate transactions completed in SecureClose NEXT and/or SecureClose Ink will be able to be linked together for easier tracking.
PreRequisites:
1. You must have an active user account within your company’s Admin Portal.
2. You must have access to document copies within the Vault.
1. Select Desired Transactions
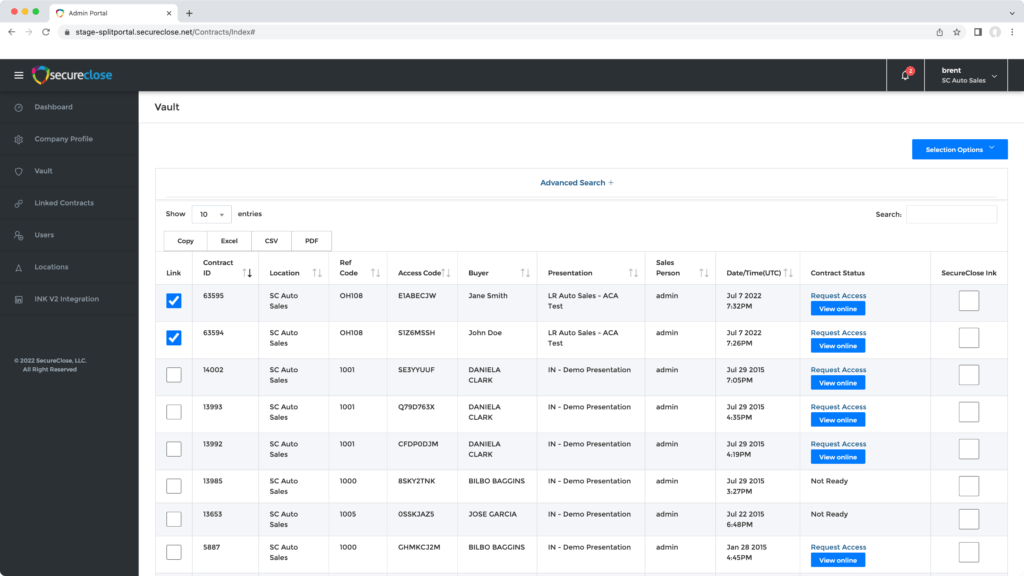
In the Vault screen, find the transactions you would like to link together and select the checkboxes to the left of each.
2. Select Link Contracts
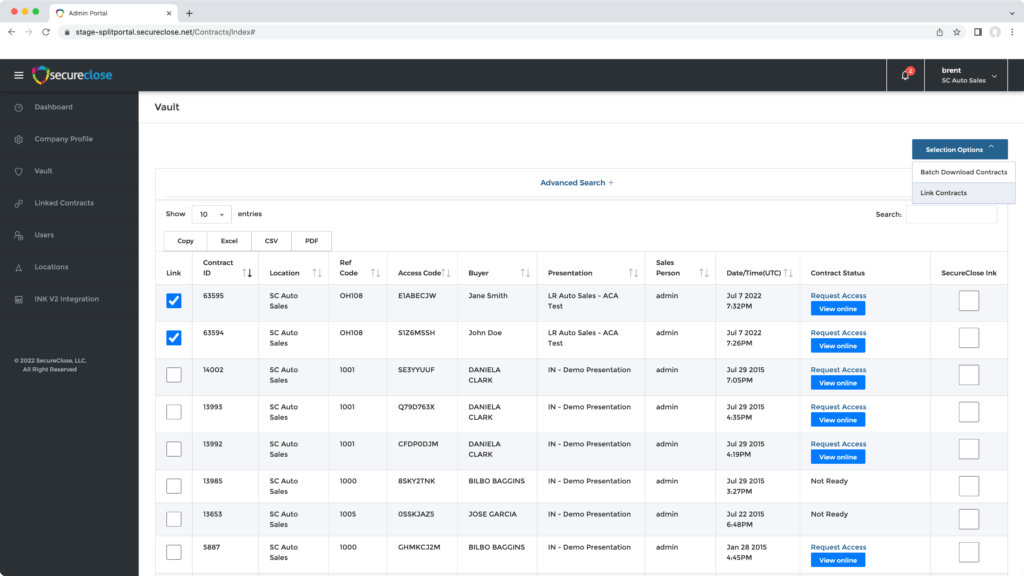
Once selected, click on the Selection Options dropdown, and choose Link Contracts.
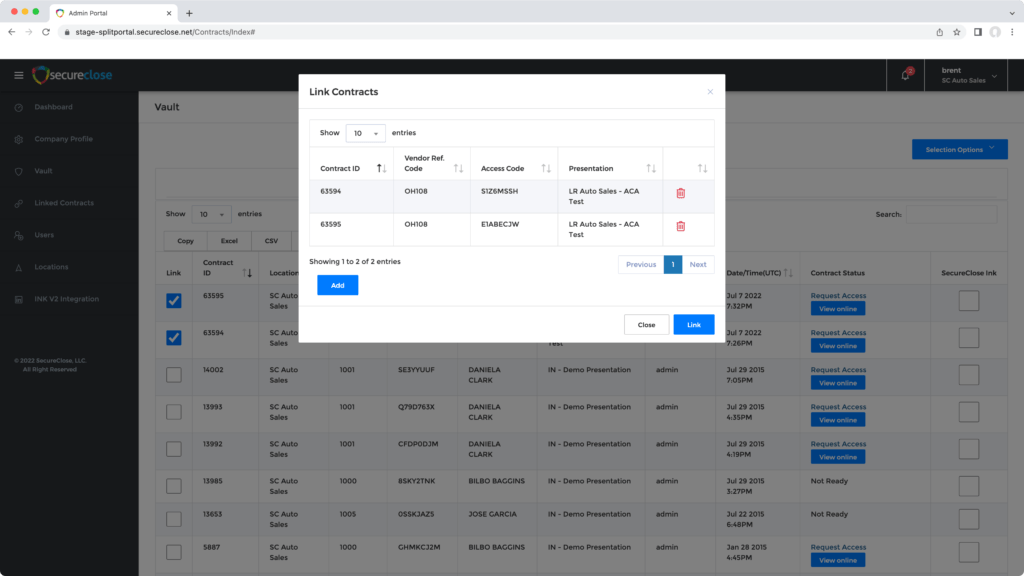
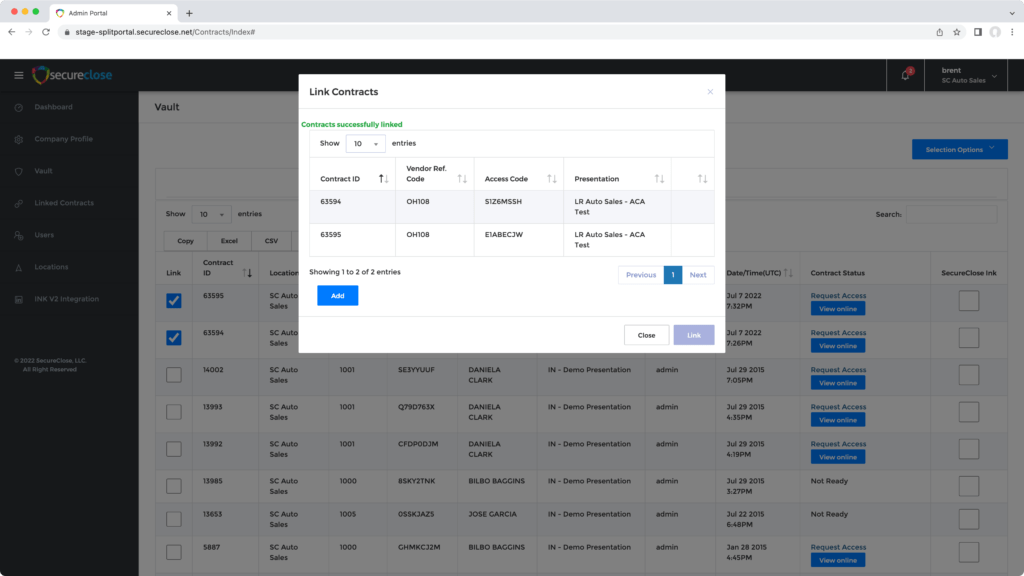
The Selected Transactions will display in the popup. You will have the option to remove any selected in error by clicking the Trash icon next to it. You can also click the Add button to add any additional transactions. Once completed, click the Link button, and you will receive a confirmation message that the link was successfully made.
4. View Linked Transaction Documents
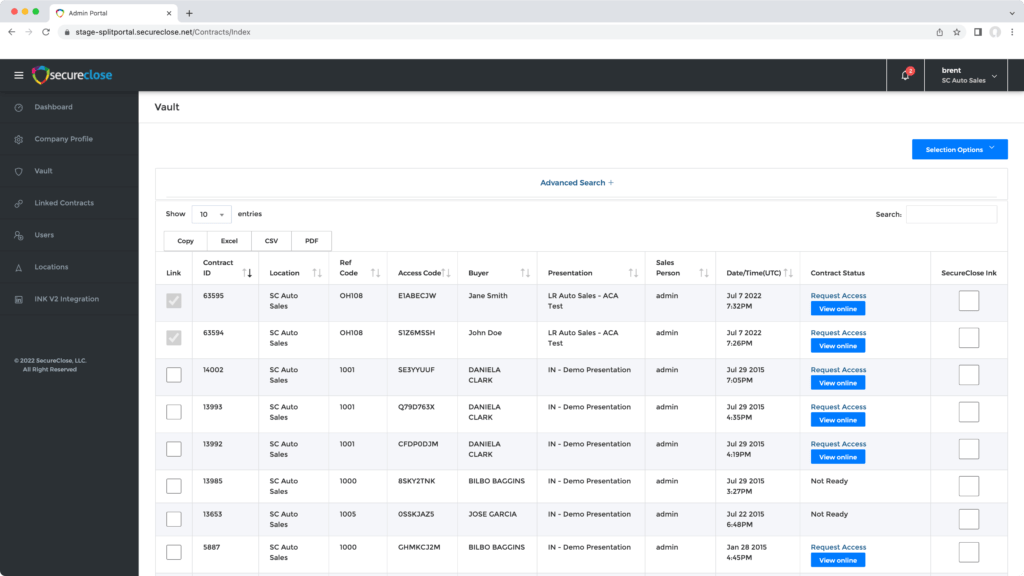
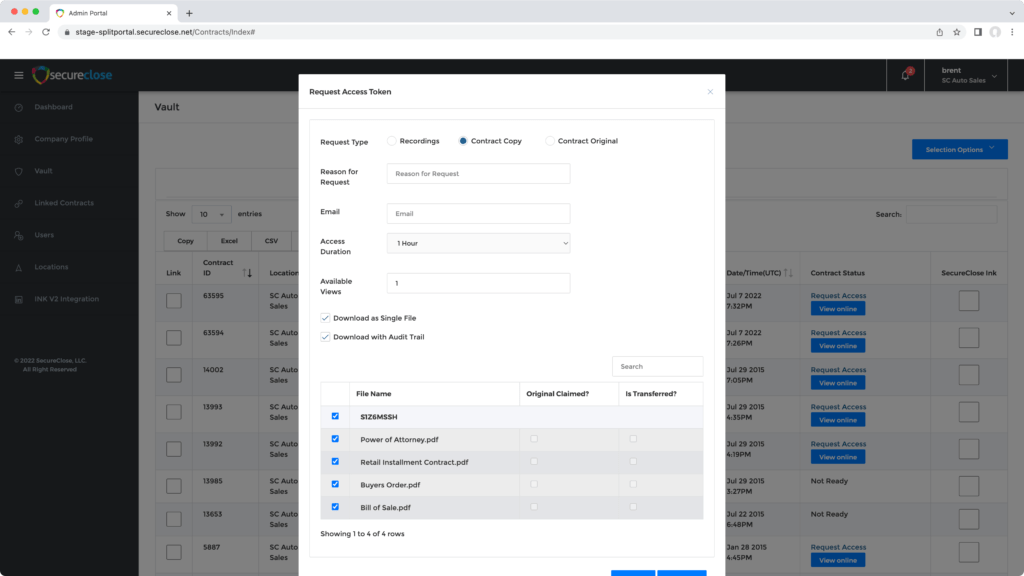
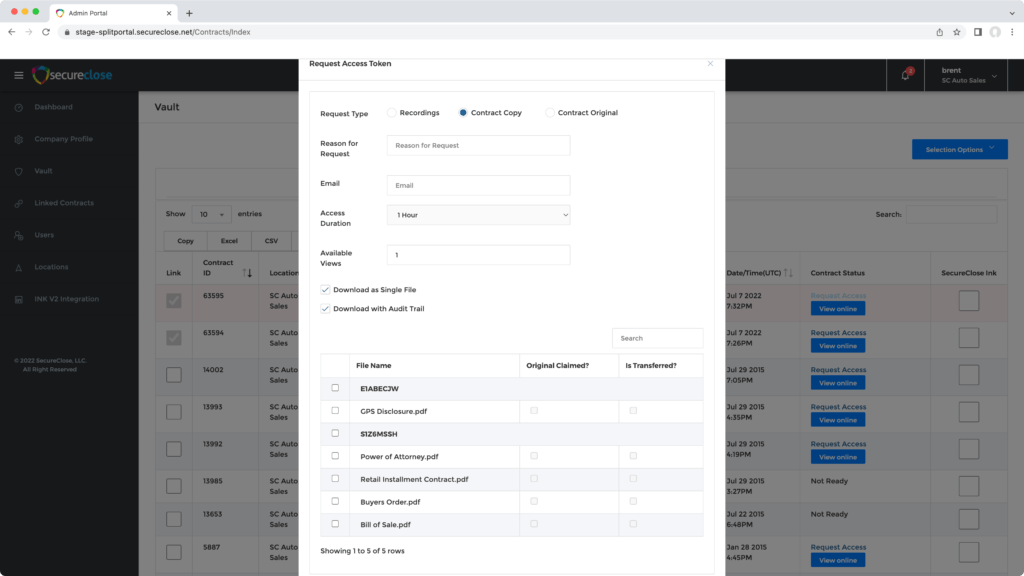
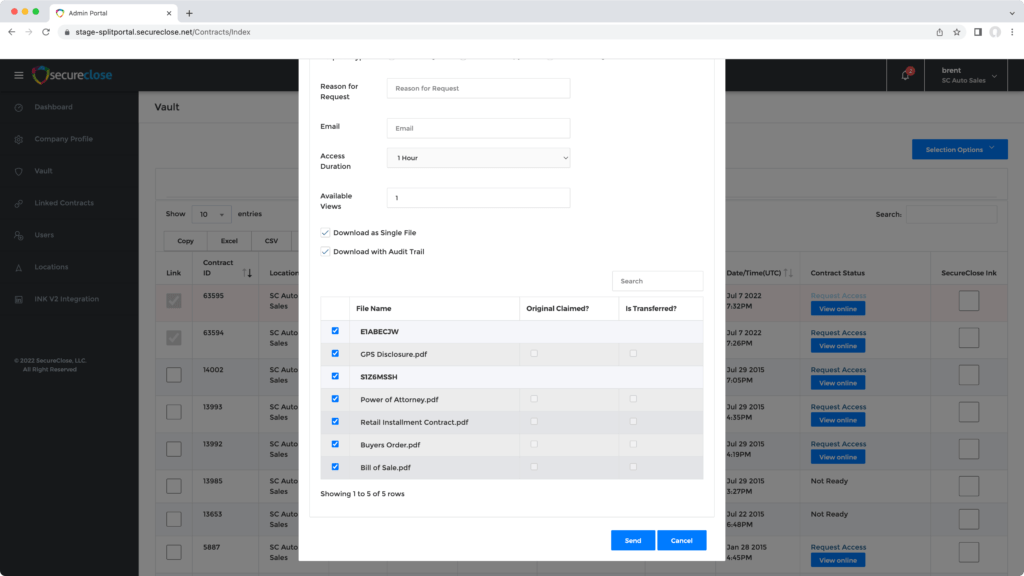
You should now see the Selection Boxes next to the linked transactions greyed out. If you click on the Request Access link next to any of the linked transactions, when you view the Contract Copy or Contract Original tabs, you will now see a list of each linked transaction, along with the individual documents associated with it. You can choose to action each individual document on its own, or as a single file together.
**This functionality will be deploying first to our Auto Master integrated users.

