
Adding a New User in the Admin Portal
This guide will show you how to add a new user in the SecureClose Admin Portal.
PreRequisites:
1. You must have access to your company’s Admin Portal, and rights to add new users.
2. This can be done from ANY computer with access to the internet, it does not have to be from the computer running the SecureClose software.
1. Go to the Admin Portal Access Page
In your web browser, navigate to https://secureclose-website.azurewebsites.net/admin-portal
2. Select Your DMS
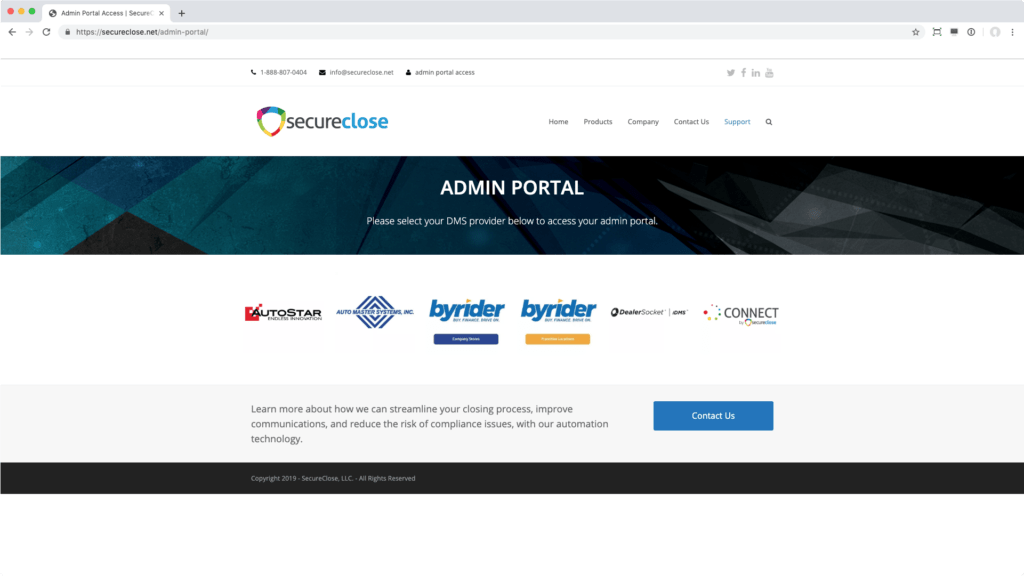
Locate your DMS provider from the list and click on it’s logo.
3. Enter Your Credentials

Enter the username and password assigned to you by your administrator.
4. Add New User
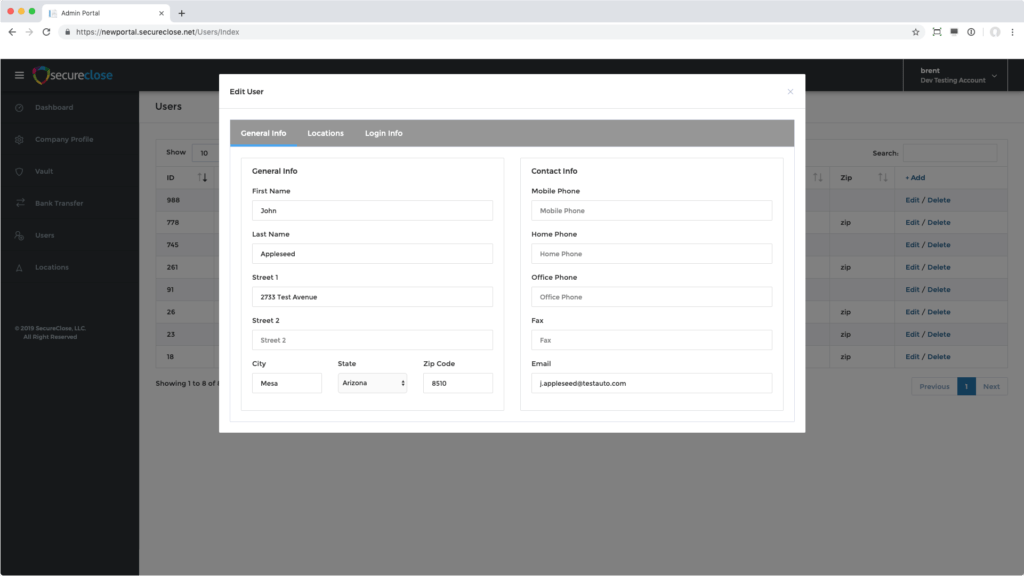
From the Navigation Menu on the left, click on the Users tab. Once in the Users List, click on the +Add link on the top right of the users grid. You will see a New User Pop Up Window consisting of 3 tabs. Starting with the General Info Tab, enter as much information about the user as you would like. Please ensure that you at least enter an Email Address – this will allow you this user to reset their password if necessary.
5. Select the Locations
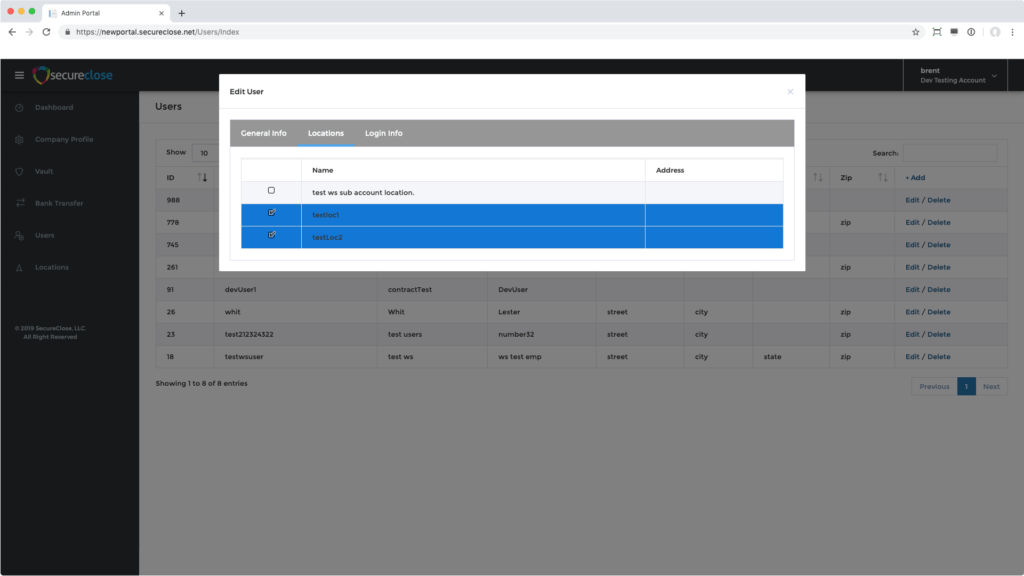
In the Locations tab, select the locations you would like this particular user to have access to.
6. Create Username and Password
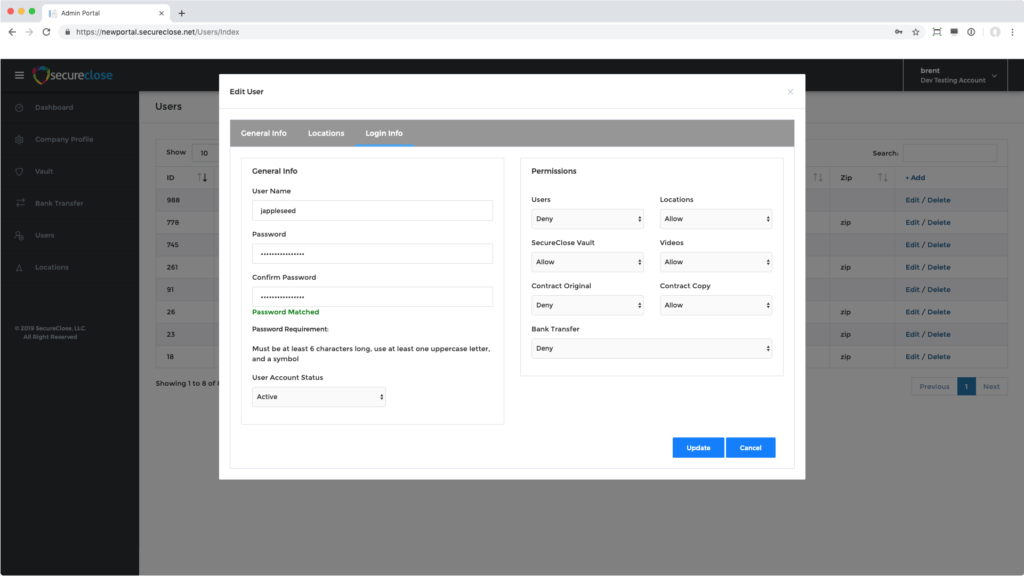
On the Login Info tab, select a username and password for the user you are creating. Please make sure the Password selected meets all of the listed requirements, and enter the desired password in both the Password and Confirm Password fields. Make sure the User Account Status is set to Active.
7. Set User Permissions

On the right side of the Login Info tab, you will see a section to define the User Permissions for this account. There are 6 Total categories (with an extra Bank Vault right available if your account requires this), and each has two possible rights – Allow or Deny. You may mix and match any of the available rights as best fits the need of the user.
*Permissions Explanation:
Users – Setting this to Allow will let the new user create or edit users.
Locations – Setting this to Allow will let the new user creat or edit locations.
SecureClose Vault – Setting this to Allow will let the new user view the Vault tab in the Admin Portal.
Videos – Setting this to Allow will let the new user request the Closing Record Videos for completed transactions
Contract Original – Setting this to Allow will let the new user claim the SINGLE watermarked Authoritative Original document for completed transactions. For MOST users, this should be set to DENY
Contract Copy – Setting this to Allow will let the new user request watermarked Copies of the transaction documents completed in SecureClose.
Bank Transfer – If your account is connected to a SecureClose Bank Vault, setting this option to Allow will let the new user transfer contracts to your connected bank vault.
Once complete, click on the Update button.
*NOTE – From this same screen, clicking the Edit link on an existing user will allow any user with the rights to do so the ability to edit or delete a user, including resetting their password.

