
Clearing the Browser Cache in Google Chrome
At times after SecureClose NEXT is updated, you may be prompted to clear your browser cache. This guide will show you the steps to do so properly.
Prerequisites:
1. The User should have closed the SecureClose NEXT Browser window.
2. The User should have opened Google Chrome to the Start Page.
1. Open the “Customize and Control” Window
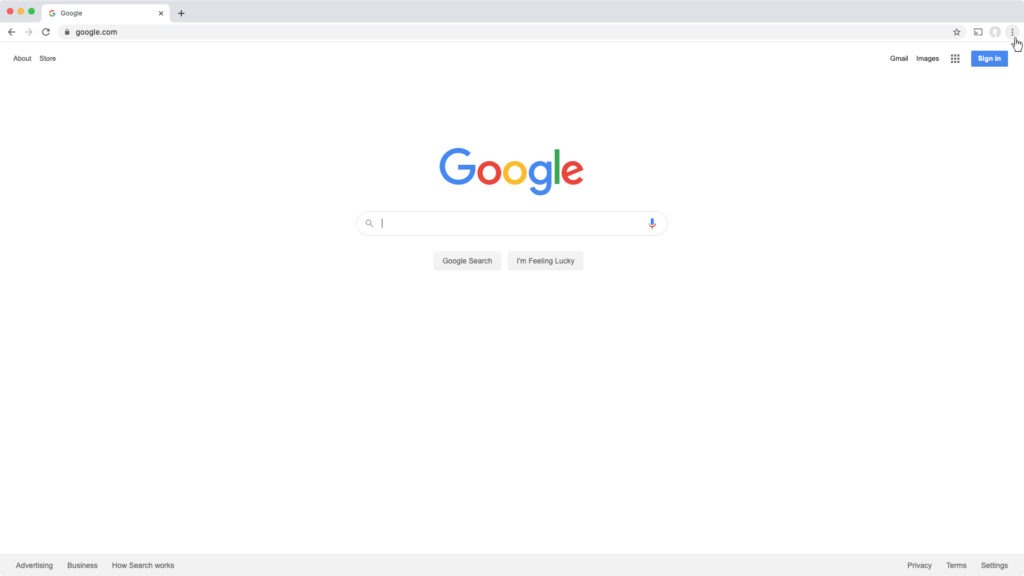 Click on the Three Vertical Dots on the top right of the Google Chrome window.
2. Select Clear Browsing Data

In the menu that appears, navigate down to More Tools, and then select Clear Browsing Data from the sub-menu.
3. Clear All Data

In the new menu that appears, click on the Advanced tab. Set the Time Range to All Time. Select Browsing History, Cookies and Other Site Data, Cached Images and Files, and Site Settings. Click on the Clear Data button.
Once these steps have been completed, your browser cache is now clear, and you can re-launch SecureClose NEXT from the icon on your desktop.
**NOTE** Once you have cleared the browser cache, you will need to grant SecureClose NEXT permission once more to access your system Microphone and Camera upon the first run, and the user will need to set the Access Key in General Settings. If you have any questions or concerns, please contact SecureClose Support.

