
Background: Now that you have created your signing, this guide will walk through the Signer’s experience in SecureClose V3. We are initiating this signing as an In-Person session, though if your signer is remote, they will receive an email to the address you provided when creating the signing and be able to complete the session at their location.
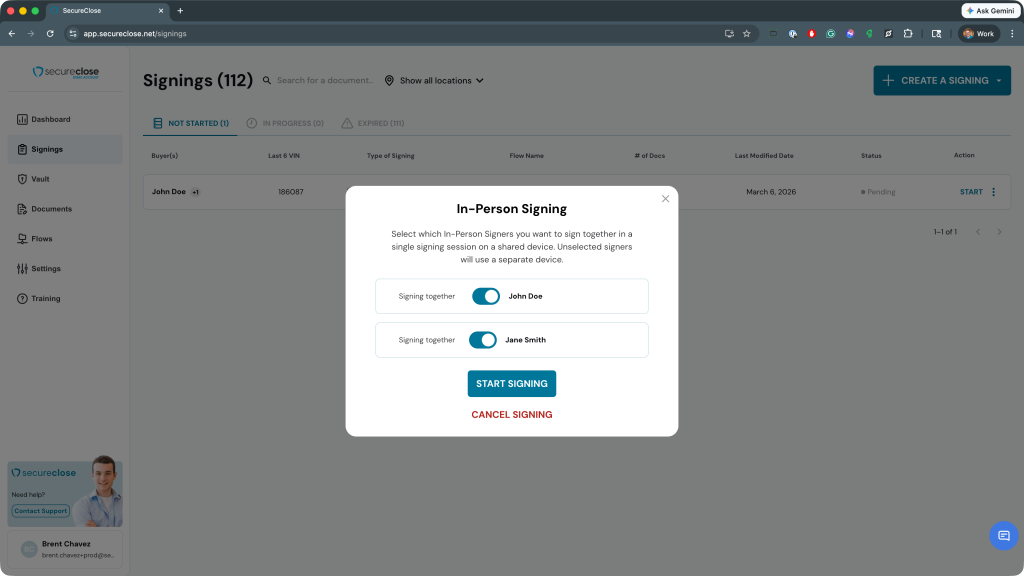
1. Start the Signing – On the computer that you’d like the customer to sign on, enter your PIN and click Start in the appropriate signing session line. As mentioned in the previous guide, Please only initiate this signing from an account with Sign Only permissions to protect your account. For In-Person Signings with multiple Signers, you will be asked to choose if the signers will be Signing Together at the same time during a single session, or separately in two signing sessions.

2. Signer Selects the Language of the Session – If multiple languages are available for the particular flow being shown to the signer, they will first be asked to select which language they’d like to proceed with. This will change all user interface text and avatar explanation videos to the language of their choice!

3. Consent to Audio and Video Recording – Now that the signer has selected the language of the signing, they will be asked to consent to Audio and Video Recording. By default, the screen will always be captured to preserve a record of what was shown and done during the session. By checking the box, the signer will also grant permission to capture the system webcam video and audio of them as they sign. If you enabled Allow Recording Exceptions, they will be able to decline this step; however, if that option is disabled, if they decline to provide permission to capture the camera, the signing will not be allowed to continue. Once the box is checked, they will need to allow permission through their browser. They can click either Allow This Time or Allow Every Time to continue. When permission is granted, they will be able to preview the audio and video capture if they would like. Next, click on the Agree button to move forward.


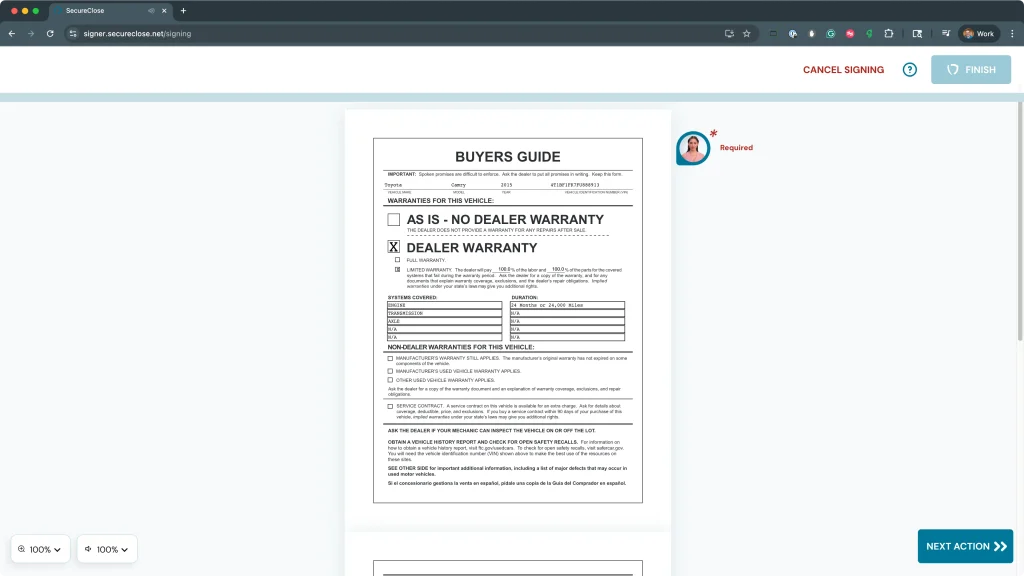
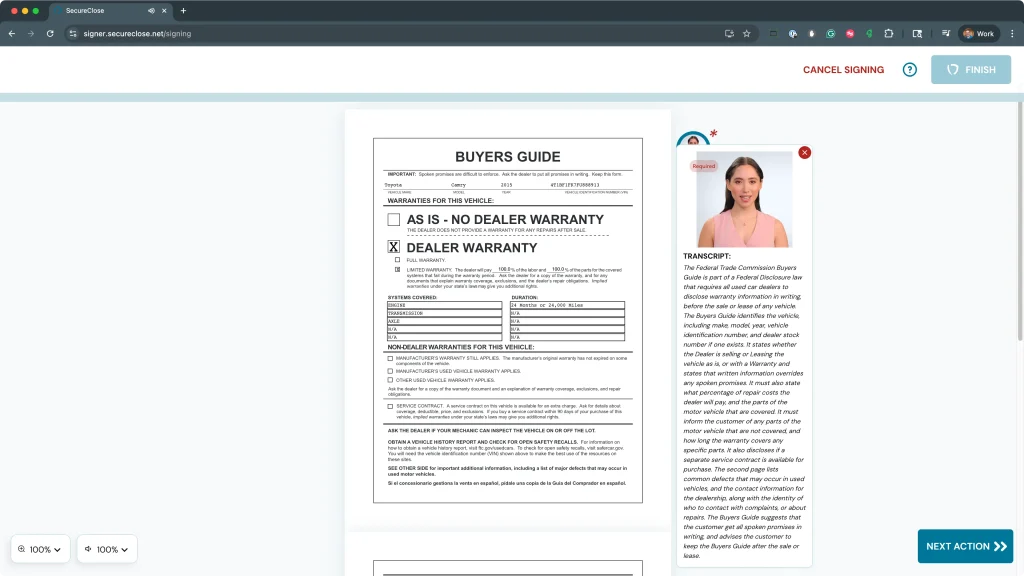
4. Signing Session – Once the signing session has commenced, the signer will see the document(s) in the middle of the screen, along with the options available to them around the perimeter. On the right margin of the document, they will see any available Avatar Explanations. If they are Required, they will be denoted as such. The signer will click on any Avatar they want or are required to view to open the disclosure. SecureClose V3 will also display the entirety of the script the Avatar is reading under each video – this helps our clients who may be hearing impaired, as well as further documenting what was said to the signer. On the Left Side of the document, the signer will see flags denoting anywhere on the document they are required to interact, including Signatures, Initials, Checkboxes, Date Placements, or Text Entry fields. These will remain bright blue until they are actioned, and then they will be greyed out. The user can also click the Next Action button to quickly be transported to the next REQUIRED action. The signer has the ability to increase the Zoom level of the documents as they view them on the bottom left. They also have the ability to Cancel the signing at any time if they would like to stop the process by clicking the link at the top-right. When all required elements are completed, the Next Action button will be transformed into Completed button, or they can click on the now-accessible Finish button on the top-right.
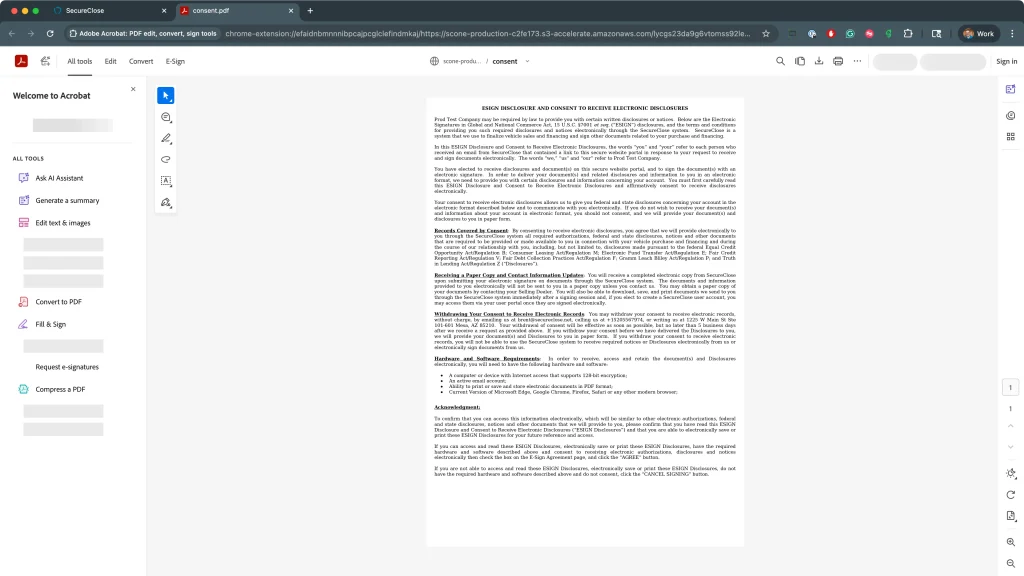
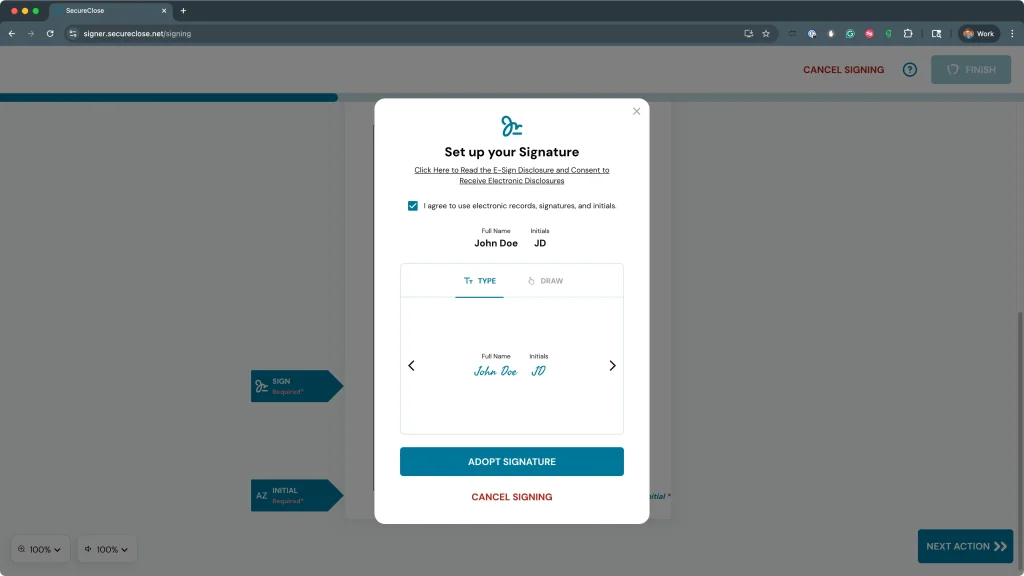
5. Consent to Signing Electronically & Signature Creation – When your signer reaches the first place on the document where their signature or initials are required, they will click the appropriate widget. The “Set Up Your Signature” window will appear. Your signer will be asked to confirm that they understand and agree that this signing session will happen electronically. They should click on the E-Sign Disclosure and Consent to Receive Electronic Disclosures link to view the full text of the agreement. Once they are satisfied, understand, and agree, they will mark the Checkbox and click Agree

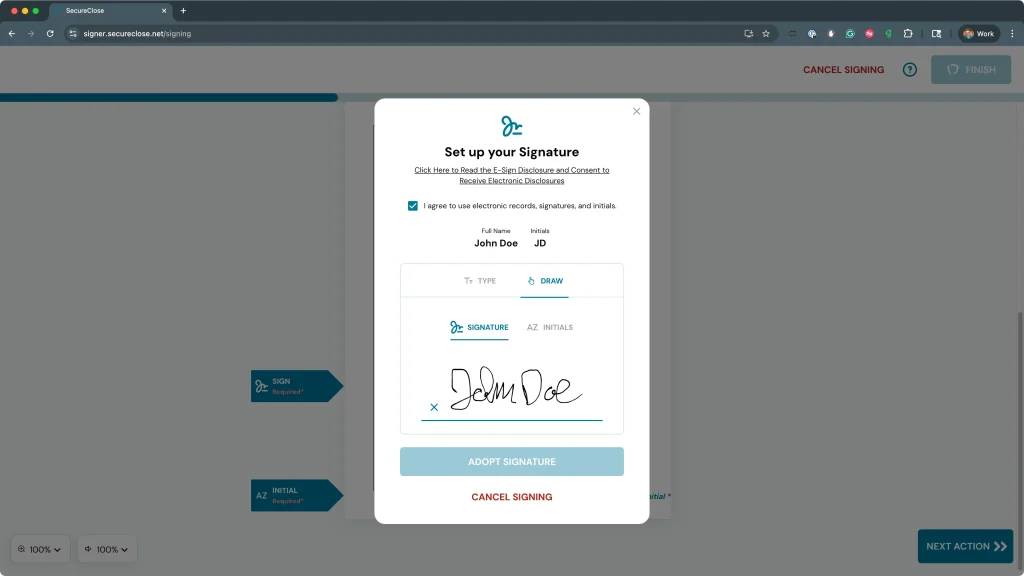
6. Create Electronic Signature – The next step is for the signer to create their electronic signature. To do this, SecureClose V3 provides 3 options:
A) Type – This option allows the signer to view a number of font options to use as their signature and initial.
B) Draw – This option allows the signer to use their mouse, finger, stylus or other pointing device (depending on whether or not they are using a touchscreen) to draw their signature and initials
C) Draw on my Phone Instead – This option, found under the Draw Tab, allows the signer to input their phone number, to receive a link to draw their signature and initials on a touch-screen device instead! To see a guide on the process to Draw on My Phone Instead – Click Here.
7. Finish the Session – Once they hit the Finish button, they will view a message letting them know that their portion of the signing is complete, and that if any additional signers still need to complete the documents, all parties will receive an emailed copy of their documents and video once they are done. They will click on the Done button to acknowledge.


8. Receive Email – Once all documents and videos are successfully processed and deposited into the vault, all signers will receive an email including a link to view their signing! They will click on the View button, which will open up their default system browser to the View Page. Here, they can view the final signed copies of any document, along with a Certificate of Evidence showing the complete details of the signing session. Lastly, they can view their Video Recordings!


