Register a New Account in SecureClose Ink
Background: This guide will walk through how to register a new user in SecureClose Ink.
Steps:
- Navigate to the Ink Account Registration Page: https://ink.secureclose.net/Account/Register
- Enter all information required, and click Register
- When the Login screen appears DO NOT login at this time. The email address you entered will receive an email asking to confirm your ownership. Click on the Confirm Your Email button.
- Clicking on the link will take you to the login screen, where you will now be able to log in. Enter the Username and Password just created.
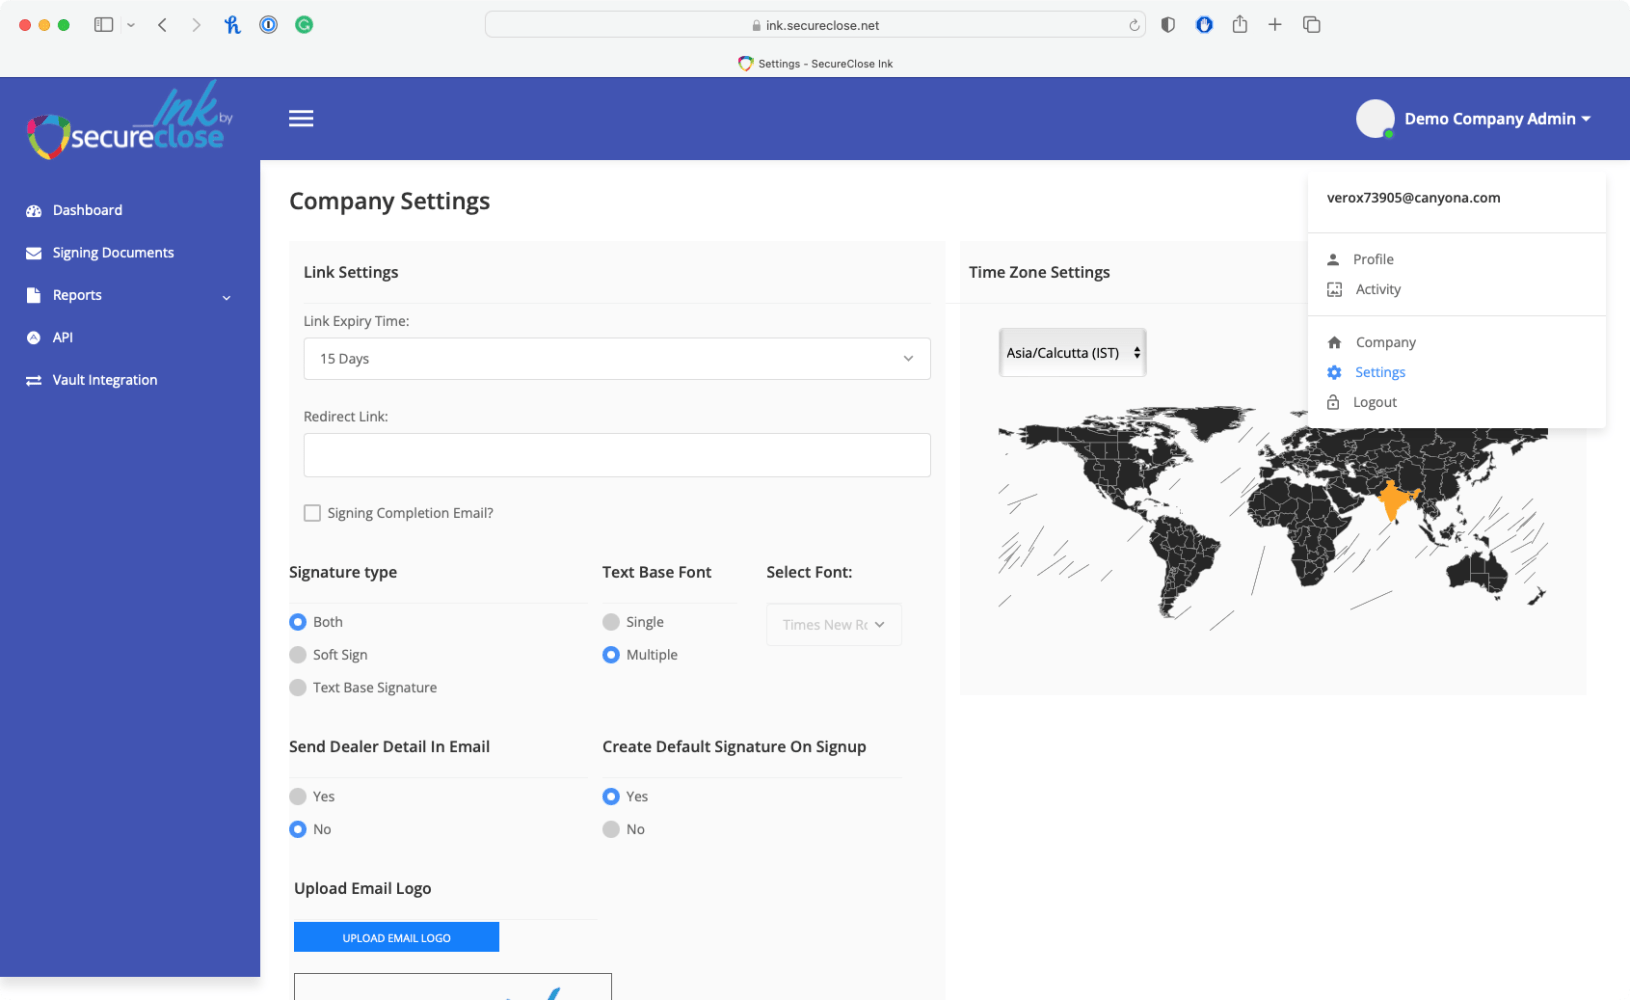
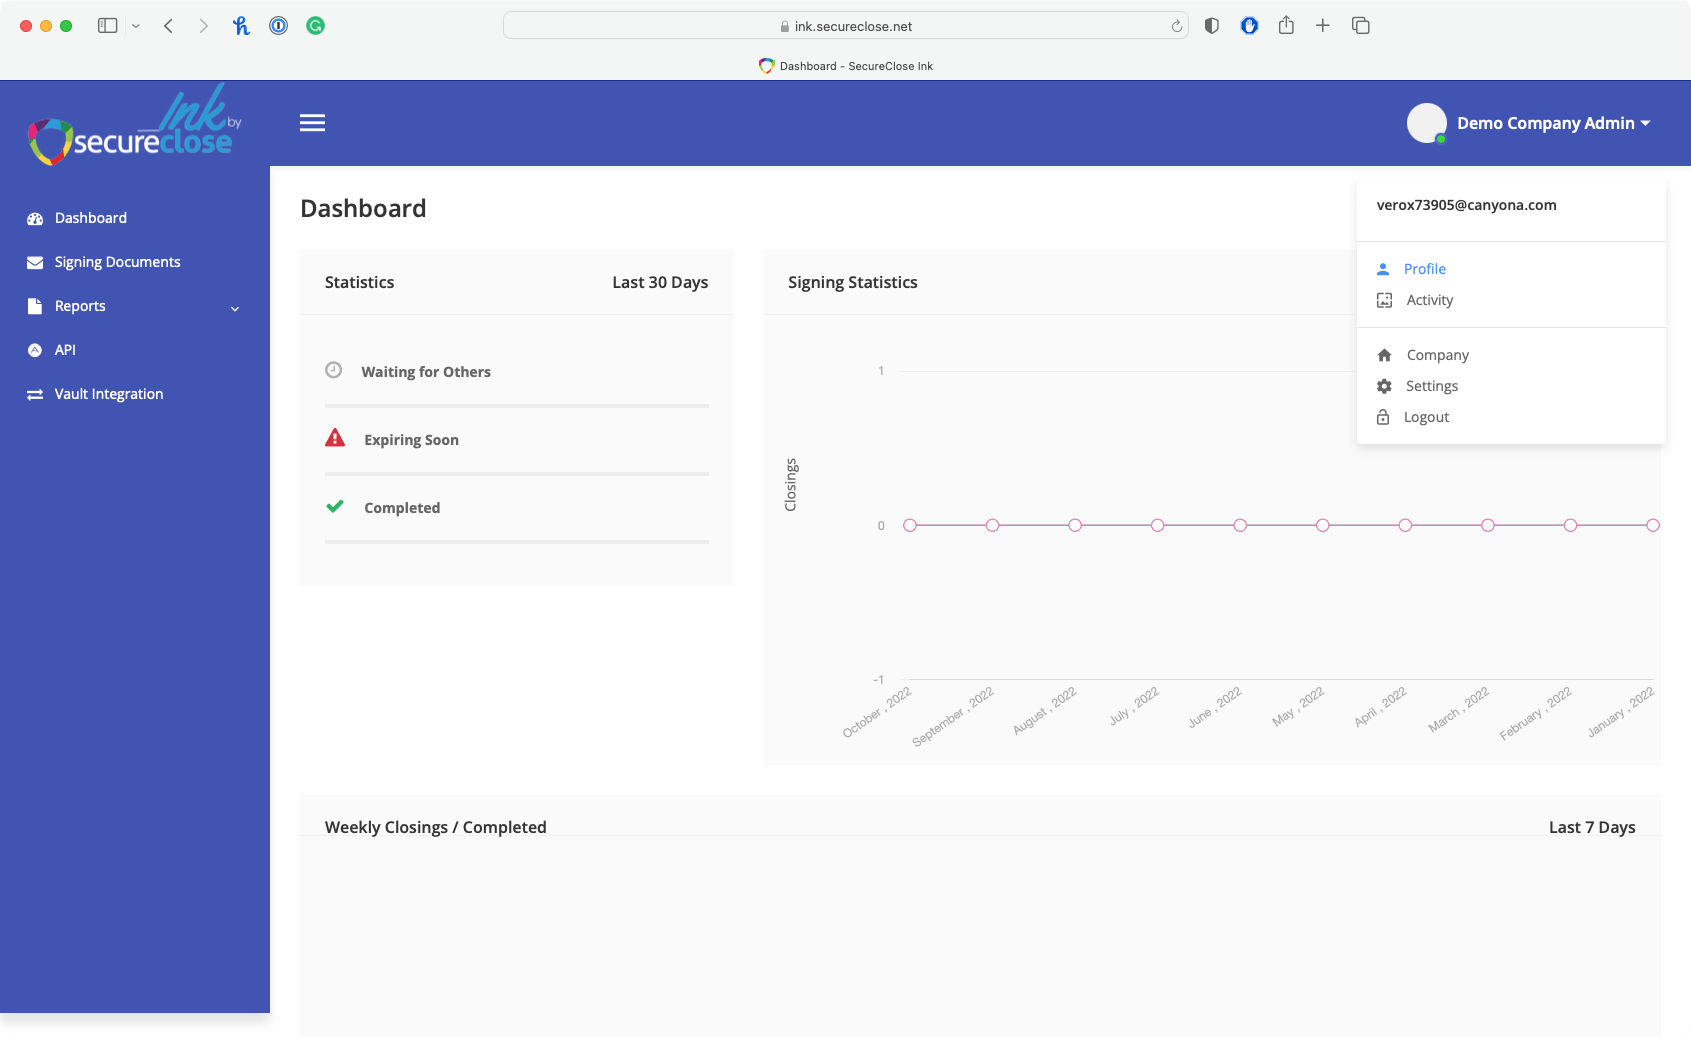
- Click the Username Dropdown on the top-right, and choose the Settings option.

- Set the timezone – This can be done from the map or by choosing the appropriate option on the dropdown menu.
- Redirect Link – Entering a URL here will redirect the user to the entered link once the signing is completed. If left blank, it will display the default SecureClose Ink Success message.
- Signing Completion Email? – If this is checked, an email will be sent confirming the success of the signing.
- Signature Options – These settings define the types of signatures available to be created by signers. By default, Both are selected, however, you have the option to limit this to a single type
- Soft Sign – This allows a signer to draw their signature on the screen
- Text-Based Signature – This allows a signer to type their name, and choose a font to represent their signature.
- Text-Based Font – This allows a signer to choose from a number of fonts, or for you to limit them to a single, consistent option across the board.
- Upload Email Logo – This allows you to upload a custom logo that will be included in ‘Invite to Sign’ emails sent to signers.
- Feature List – This section allows optional features/requirements to be enabled
- SMS Verification – This adds 2-Factor Authentication that forces a signer to verify their ownership of the SMS number entered
- ID Verification – This forces a signer to upload an image of their face and a picture of their ID/Drivers License to perform a basic ID match verification.
- Both of these Features have 3 Different Options
- Enabled – Feature is turned on, but optional on a per-signing basis
- Disabled – Feature is turned off, but optional on a per-signing basis
- Enforced – Feature is turned on and required for ALL signings generated in your account.
- Both of these Features have 3 Different Options
- Click on the Username dropdown on the top-right, and select the Profile option.
- Update the user information as necessary, including Name, Phone Number, Email Address, and Signature.
- If you’d like to change your default signature, click on the Update Originator Signature. You can change and save the signature so it looks as you’d prefer.
- Click on the Username dropdown on the top-right, and select the Company option.
- On this page, you can edit any/all company information, and add additional users to your account.