Using an Access Code Generated in your DMS with SecureClose Ink
Background: This guide will walk through how to use a Presentation (Access) code that you generated in your DMS with SecureClose Ink. Please Note – this feature is currently in Beta and only available on a limited basis.
Prerequisites:
– You must be using one of SecureClose Integrated DMS Partners
– You must have already provided SecureClose with the list of documents in your DMS that you would like to send to SecureClose Ink.
– SecureClose must have already performed the necessary setup with your DMS in order for your integration to be live, and the appropriate documents within your DMS to be selectable.
– You must have already generated a presentation ID in your DMS.
Steps:
- Log into your SecureClose Ink account.
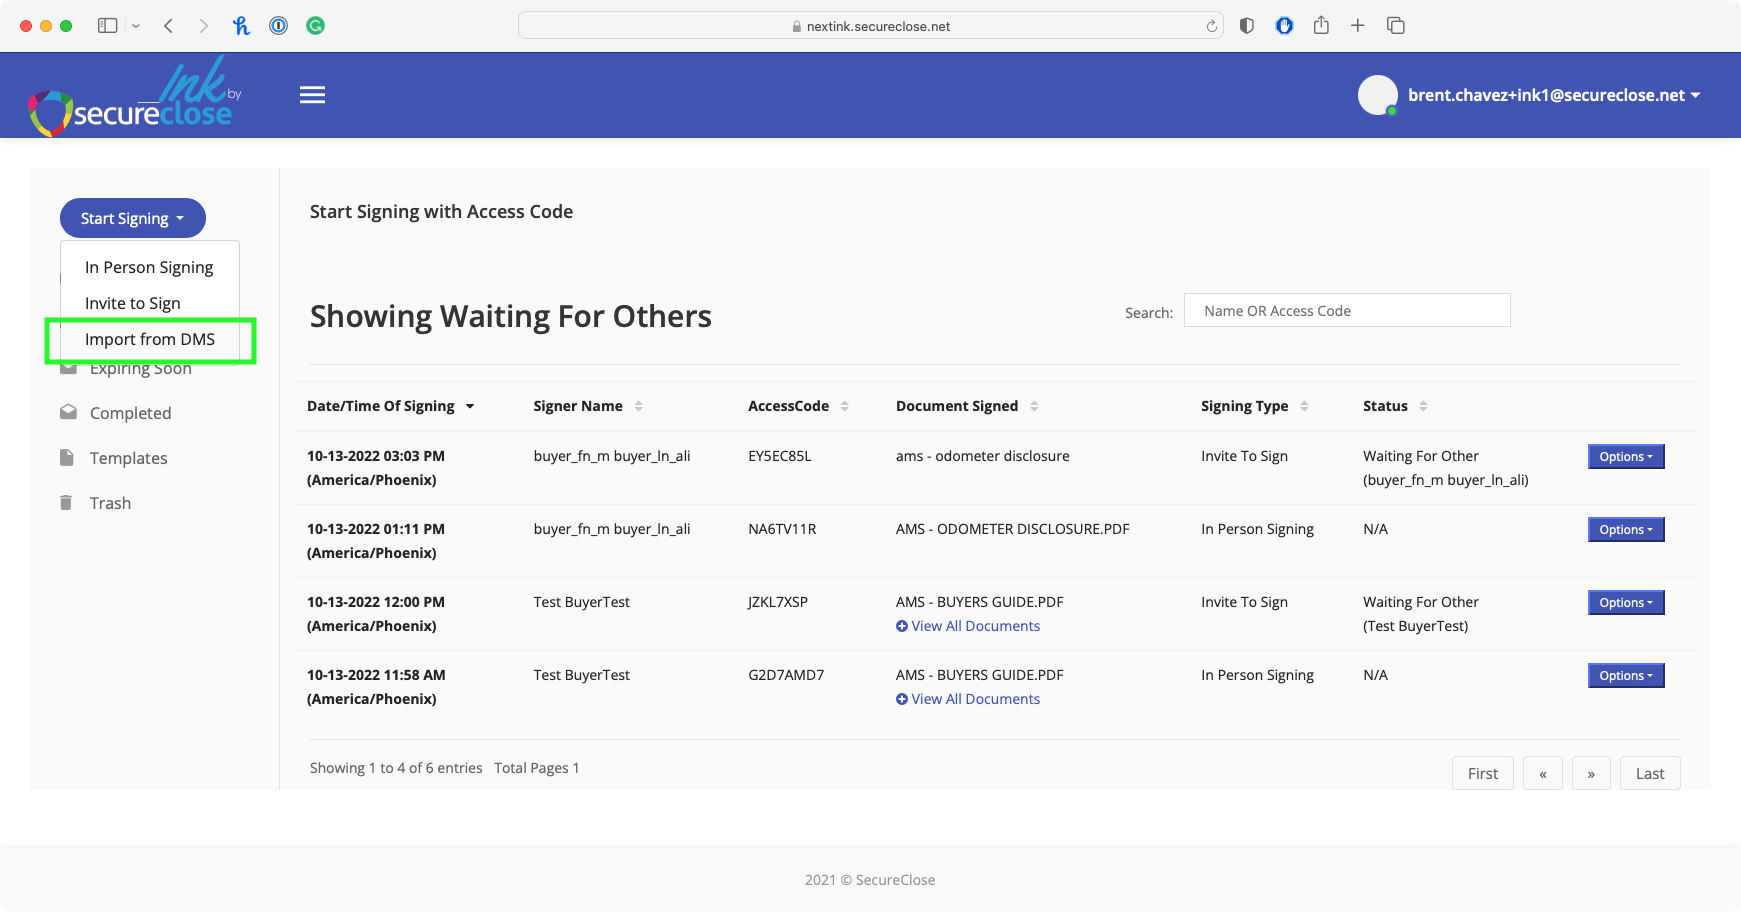
- From the Left-Hand Menu, click the Signing Documents option.
- From the Start Signing menu button, click on the new Import from DMS option.

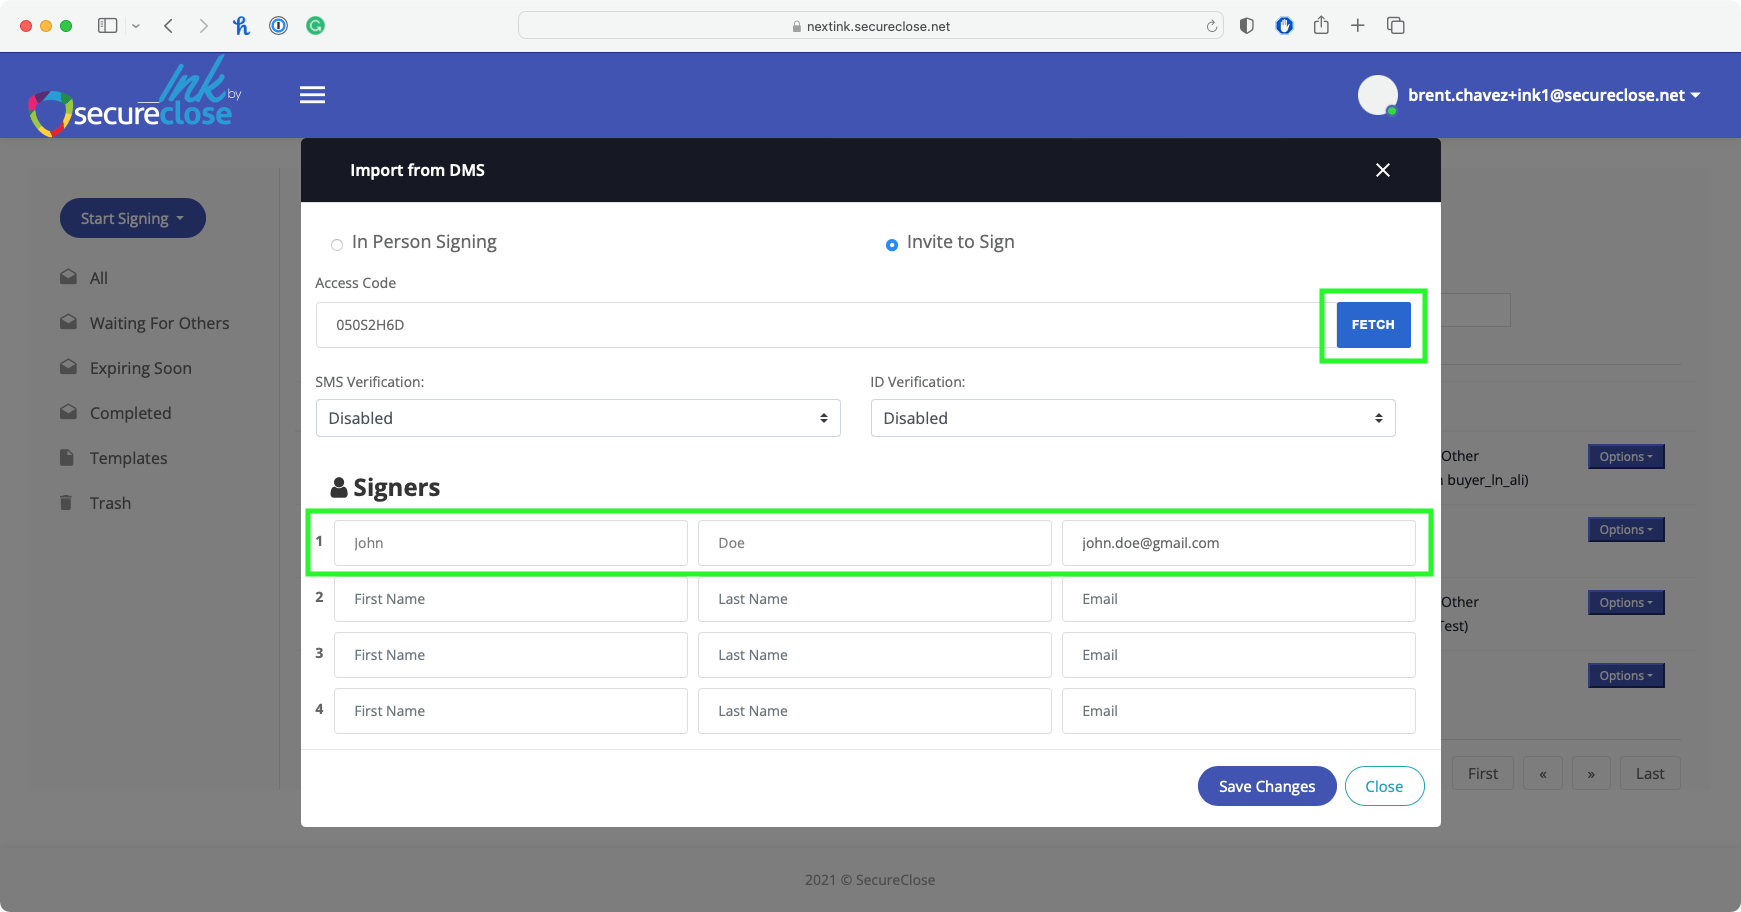
- In the popup screen that appears, you have two options: In Person Signing or Invite to Sign. These options mirror the standard options in SecureClose Ink. Choose the option you would like using the two radio buttons. Input the Presentation ID/Access Code you generated in your DMS, and click on the Fetch button. You will see the signer information (First Name, Last Name, Email Address, and Phone Number if applicable) that you entered in your DMS when the Code was generated. If any of this information is required, but missing, you will be asked to input it before moving to the next step. Also, if you would like to add an additional signer/recipient, you can do so from this menu. When all information is entered, click on the Save Changes button.
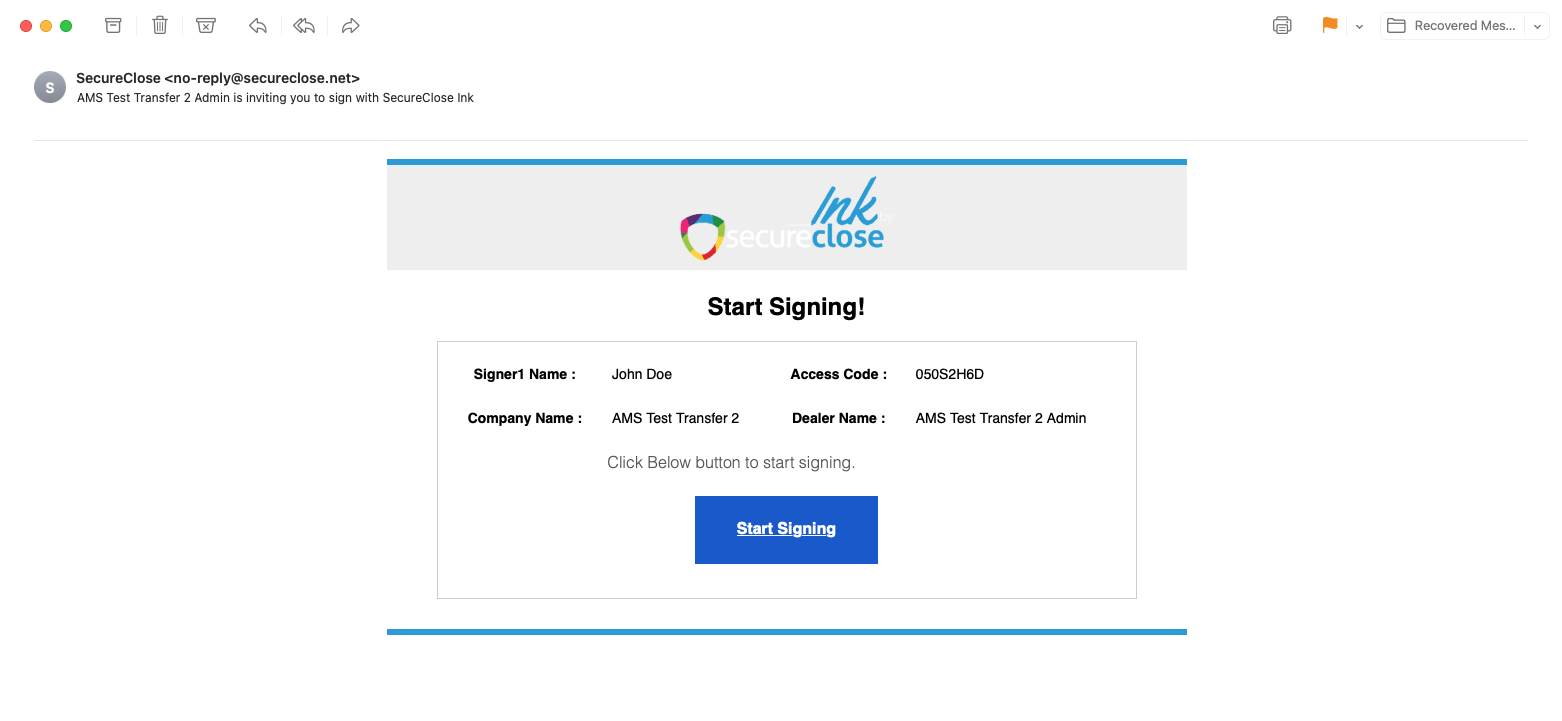
- If you chose Invite to Sign your first recipient will receive an emailed link to sign the included documents.

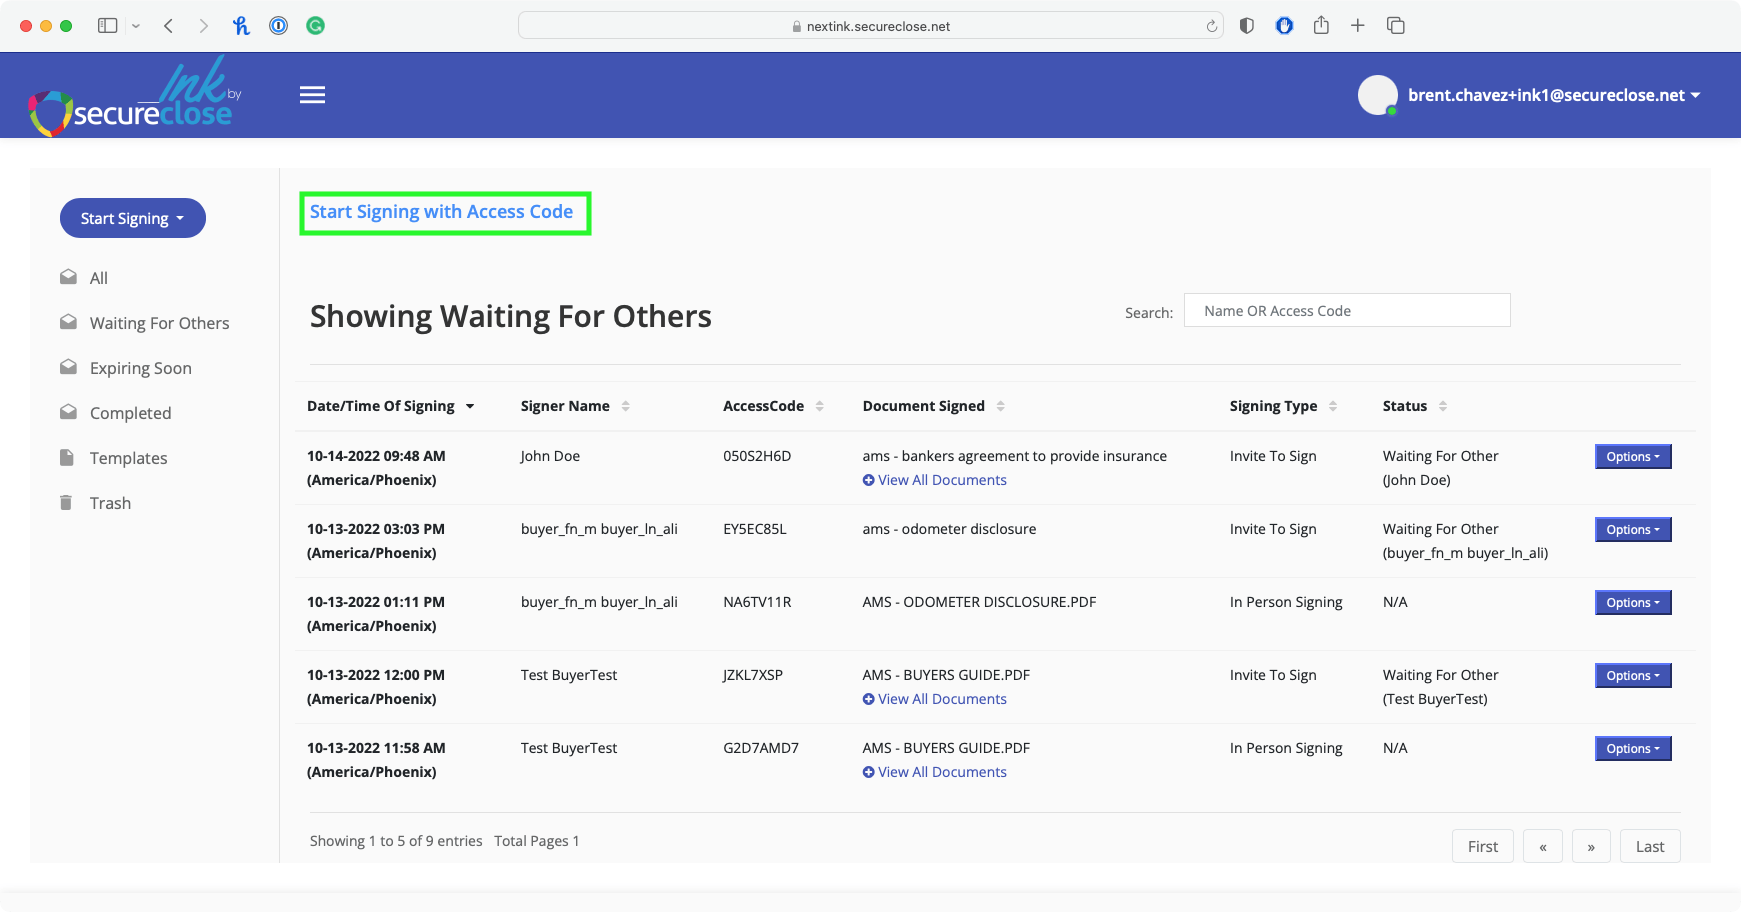
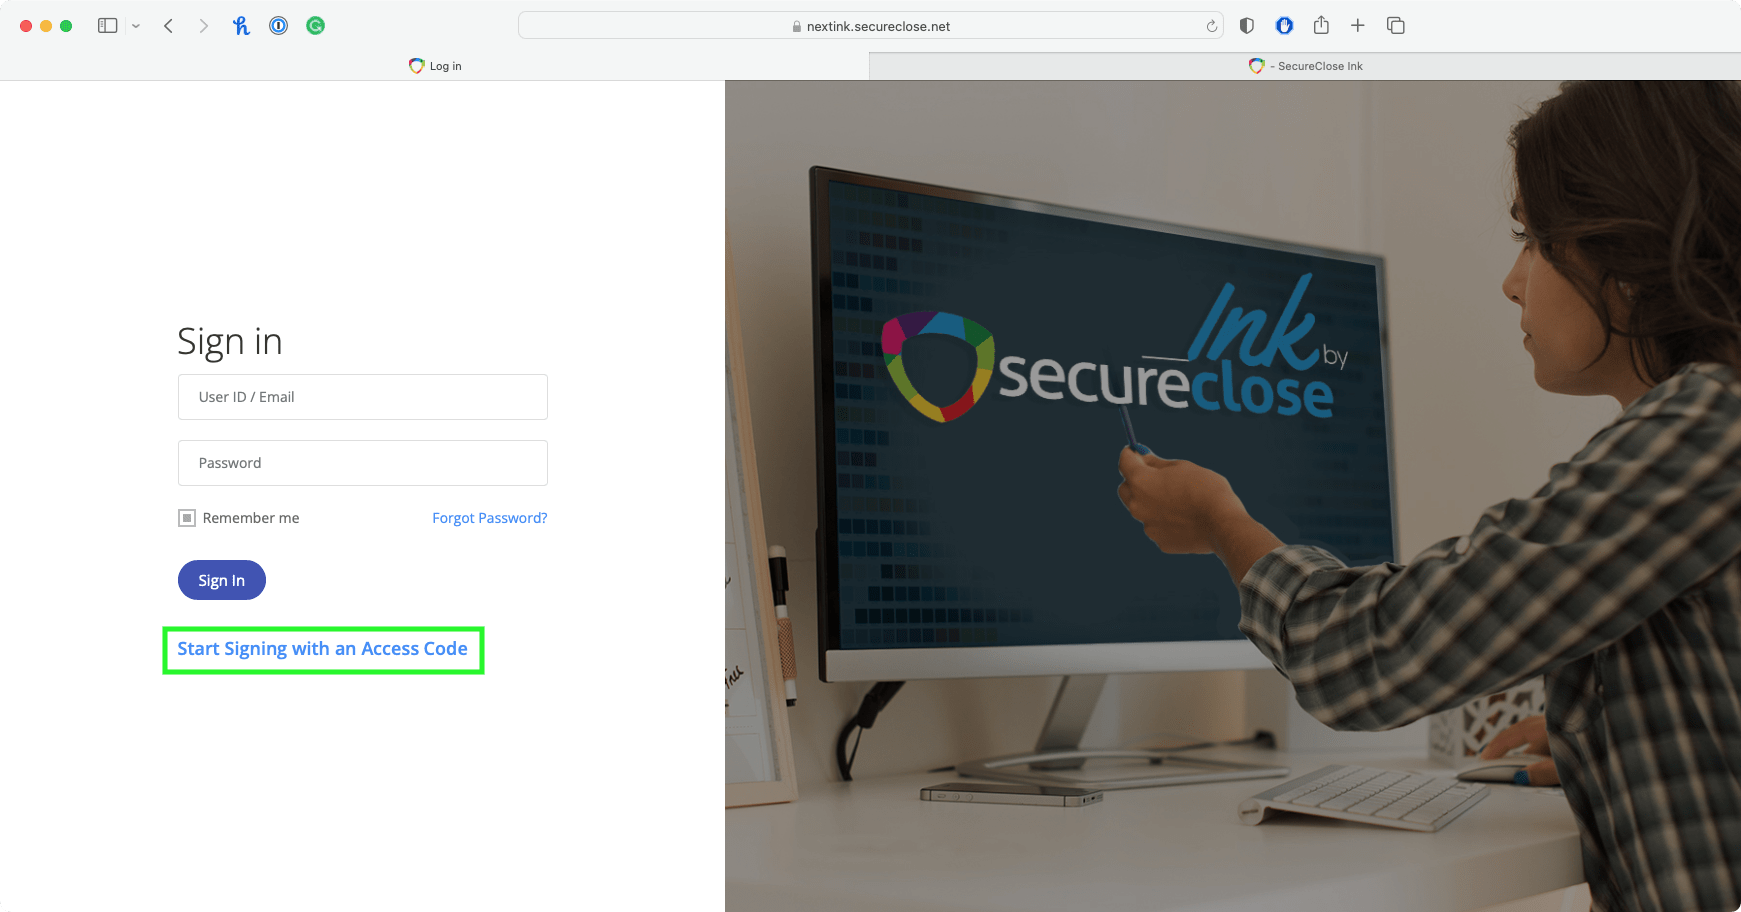
- Alternatively, if you would like to sign In Person you can follow the steps above, but choose the In Person setting. You can also enter the Access Code directly on the Start Signing with Access Code screen – accessible in the Signing Documents Screen or from the Login Screen as shown below.
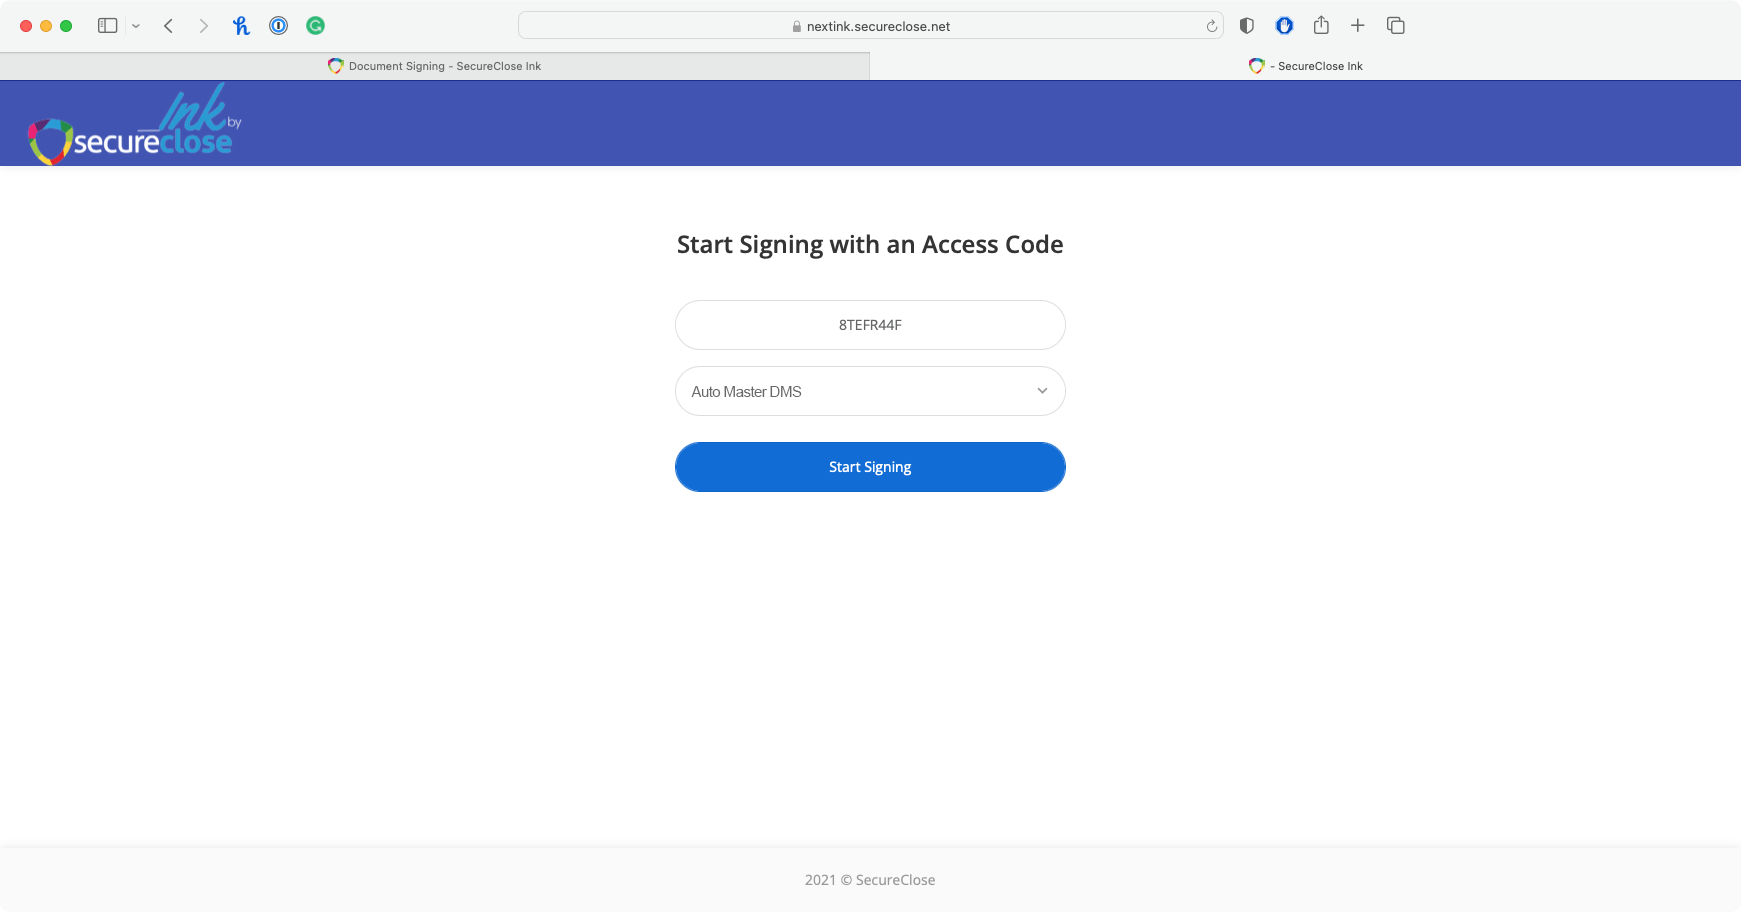
- On the Start Signing with Access Code screen, enter the Access Code you generated in your DMS, then from the DMS dropdown, select the DMS that you used to generate the ID, and click on the Start Signing button to begin the in-person signing process.